Native eCommerce
Products in Native Store
Products in Native Store
 This content is only relevant for native store.
To determine which eCommerce solution you are on, see How do I know if I am using Native eCommerce or Third Party eCommerce?
Products are listed in the Product Catalog. From the Product Catalog, you can add new products and view or edit existing products. The Product Catalog uses connected data to connect to the Product page. This means when you add a new product, a new dynamic product page is created and the widgets on the page are connected to fields within the Product Catalog. When you update a product in the Product Catalog, the changes automatically appear on the corresponding product page.
Product Types
The following product types are available:
-
Physical product. Sell merchandise, apparel and other physical goods.
-
Digital product. Sell e-books, digital prints, music, etc.
-
Service. Get paid for events, classes, gift vouchers, etc.
-
Donation. Receive donations or fundraising money.
Digital Products
Digital Products (also known as e-goods or downloads) are goods that are in digital format. Once purchased, customers are able to download or access them via a link in the order confirmation email. Unlike physical products, digital products are intangible and do not require shipping or handling.
Following are examples of digital products:
-
E-Books. Electronic versions of books that can be read on computers, e-readers, or mobile devices.
-
Online Courses and E-Learning Materials. Educational content, including video lectures, PDFs, quizzes, and other materials that customers can access to learn a new skill or subject.
-
Music and Audio Files. Digital music tracks, albums, or audio files such as podcasts and audiobooks.
-
Video Content. Movies, documentaries, tutorials, or any video content that can be streamed or downloaded.
-
Templates and Documents. Pre-made templates for resumes, business plans, presentations, etc., that customers can customize for their own use.
-
Stock Photos. High-resolution images that can be purchased and used for various purposes such as advertising, blogging, or design.
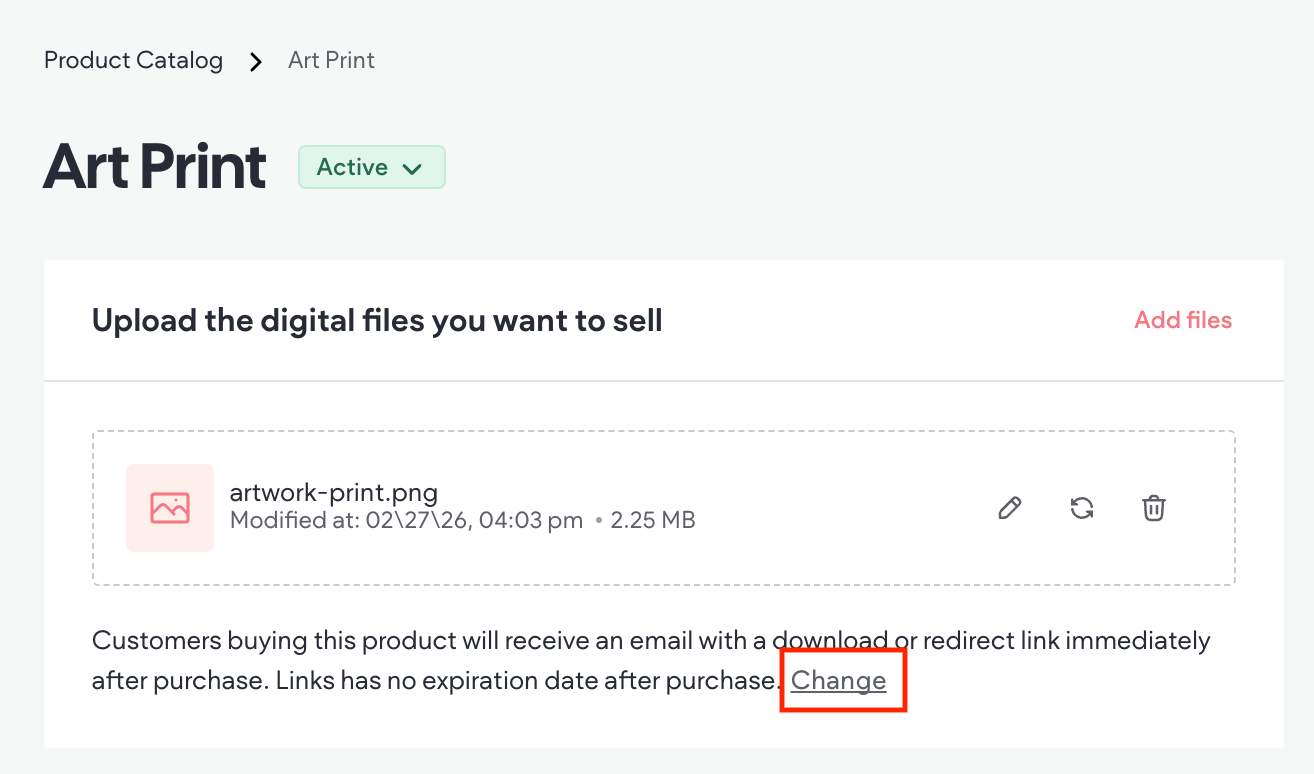
Set Expiration for Digital Product Download Link
By default, the link used to download a digital product expires after 30 days. However, you can set a custom number of days or set the link to never expire.
To set the expiration for a digital product's download link:
-
In the side panel, click Store, then click Store Management.
-
Click Product Catalog.
-
Open a digital product.
-
Click Change in the Upload the digital files you want to sell section.
-
Select either Set to expire after and enter the number of days, or Set to never expire.
It is important to note that the changes only apply to future orders and any digital product confirmation emails you resend to customers.

Donations as Products
This product type offers the ability to accept donations. An easy way to set the product up to offer different amounts is to set the price to $0 and include the amounts as selectable options.
Note
Even though it's a donation, there may still be a processing fee from the payment gateway you are using. We recommend seeking guidance from an expert.
Add Donation Product
To add a donation product:
-
Follow the steps in the Add Products section. For the product type, select Donation.
-
In the Pricing area, set the Price to $0.
- It is important to note that if you are using Stripe as a payment gateway, there is a minimum total charge requirement. For example, the minimum total for USD is $0.50, so if a customer makes a donation of $0.49, Stripe will return an error and the customer will not be able to complete the transaction.
-
Set the desired donations amount in the in the Donation amount options area.
- The option Select amount with values will be added by default. To edit the options, click on the Select amount option and edit the values as desired. Or, you can delete the default option (Select Amount) and create your own using Product Options.
-
In the Manage variants area, edit each variant’s price to match the variant type. To learn more, see Product Variants.
Add Products
To add new products:
-
In the side panel, click Store, then click Store Management.
-
Click Product Catalog.
-
Click +Add a product.
-
Select the product type. To learn more about the available product types, see Product Types.
-
Fill in the fields with the product’s info. For more information on the available fields, see Product Sections and Fields.
For better SEO, schema markup is automatically generated for every active product. If a product is set as a draft or editor preview, the schema will be removed.
For a quick overview on how to add a physical product, watch the following video:
<!-- iframe instead of embed for d:videodata -->Product Sections and Fields
Each product has some of the following sections and fields, depending on the type of product:
-
Upload the digital file you want to sell (Digital products only). Customers buying the product will receive an email with a download or redirect link immediately after purchase.
-
If a digital product is created without adding a file, it will be saved in draft mode until a file is added.
-
Up to 10 files can be uploaded per product, with each file up to 100mb.
-
When using the Link (URL) option, the data or file is not saved on the site or anywhere within Website Builder, this option simply provides a secure way to sell it.
-
-
Product info (section name will vary depending on the type of product).
-
Title. Name of the product.
-
Description. Use the text editor to write a description of the product. You can click the sparkle icon
 to use the AI assistant to help edit your description.
 -
Product Images. Add up to 20 images to showcase the product. PNG or JPEG are the supported formats. Drag and drop the images to arrange them in the desired order.
-
-
Pricing.
-
Price. The price shoppers pay for the product. If you would like to include the tax in the product price, see Include Taxes in Product Price
-
Sale Price (Physical, Digital, and Service products). The price of an on sale item. Enable the toggle to mark an item as on sale. The Product Price widget on the product page will automatically display the sale price if this toggle is enabled (sale price will be noted on the Product Gallery widget as well).
-
Lowest price history. If the product is on sale, the lowest price within the last 30 days will display in the price widget on the product page. Enabling it for one on sale product will enable it for all other on sale products in the catalog.
-
Tax code. This is only applicable if you use Avalara for taxes. Use the dropdown menu to select the relevant tax code.
-
Product's purchase type. The product can either be a one-time purchase, or a subscription.
-
-
Inventory (Physical and Service products; renamed Attendees limit for Service products).
-
Track inventory (Physical products only). Enable this option to set the number of items you want to sell before it’s out of stock. If the product has options, inventory will need to be set. For more information, see Product Inventory.
-
Track the number of people who buy this service, like in a paid class with limited spots (Service products only).
-
Status. Set the stock status to note if it is in or out of stock. If the product has options, inventory will need to be set. For more information, see Product Inventory.
-
SKU. Stock Keeping Unit.
-
-
Shipping (Physical products only). Turn this off for products that don't require shipping.
-
Options (Physical, Service, and Donation products only - not Digital products; section name will vary depending on product type). For more information, see Product Options. For more information on Options for the donation product type, see the Donations section.
-
Product customizations. If you sell a product that offers customizations, such as a bracelet with an engraving, you can add a field to the product page that allows the shopper to enter their customization. To learn more, see Product Customizations.
-
Manage variants (Physical, Service, and Donation products). Each variant is a distinct sellable version of the product, based on the option values you entered per product. For more information, see Product Variants and Product Inventory.
-
Product Attributes (Physical, Service, and Donation products). Previously named "content blocks", Product attributes allow you to add more detail to your product page such as: brand, ingredients, and important notes. Product attributes will show on all product pages of your catalog, unless they are left blank. For more information, see Display Additional Information about a Product.
-
Product SEO. Product page URL is formed automatically based on product name. The URL slug can be changed and it will override the default URL. To edit the Product SEO, click the three horizontal dots
 icon next to Product SEO, then click Edit Product SEO.
-
Page Title
-
Meta Description
-
URL Handle. The URL slug overrides the default product page URL.
-
-
Status. You can set the status for individual products to be visible or hidden from the live store. This field does not use connected data to connect to a widget on your Product page. The available statuses are:
-
Active. The product is available for shoppers to view in your Store.
-
Inactive. This allows you to see a preview of what your product will look like in the live Store, but it will not be visible to shoppers in your Store.
-
Draft. Your product is saved in the Product Catalog, but it will not be visible to shoppers in your Store.
-
Edit Products
To edit products:
-
In the side panel, click Store, then click Store Management.
-
Click Product Catalog.
-
Click the product you want to edit and edit as necessary.
-
Click Save.
Delete Products
To delete products:
-
In the side panel, click Store, then click Store Management.
-
Click Product Catalog.
-
Click the three horizontal dots
 icon next to the product you want to delete.
 -
Click Delete product.
Once you delete a product it cannot be undone.
Display Additional Information about a Product with Product Attributes
Product attributes (formerly known as Content Blocks) are used to display additional information about a product on its product page, such as instructions or warranty information. To use product attributes, you need to create a product attribute in a product in the product catalog, add a widget to the product page where you want to display the content, then connect the widget to the product attribute in the product catalog.
You can add up to 50 product attributes per site.
Create Product Attribute and Connect to a Widget
To create and connect a product attribute:
-
In the side panel, click Store, then click Store Management.
-
Click Product Catalog.
-
Click the desired product to open it.
-
In the Product attributes section, click +Add Attribute.
-
Type a title (2000 characters maximum). This cannot be the same as another default field, such as the product name or description.
-
Use the Choose this attribute's content type drop down menu to select the field type. Currently, HTML/rich text, plain text, video, and image are supported. Only a single image can be added per product attribute. To add multiple images, a product attribute will need to be created for each one.
-
Click Next.
-
Add content to the custom field you just created, then click Save at the top right of the page.
-
Next you need to connect the product attribute to a widget on the product page. Start by clicking the connected data icon next to the product attribute you just created. This will take you to the product page.
-
Depending on the product attribute's field type (rich text, plain text, image, or video) the corresponding widget(s) will be available in the widget panel. For example, if you added a text field, you need to add a widget that supports text (for instance, a text or accordion widget). Drag and drop the desired widget onto the product page where you want the product attribute displayed.
-
Click the widget you just added and click the connected data icon (location of the connected data icon varies by widget). In the popup, use the Select the data you want to connect dropdown menu to select the product attribute you created previously.
-
Click Connect.
Once created for one product, it will be available in the edit area for each product. The product attribute will only display on product pages when there is a value assigned to the product attribute for that specific product.
Product Options
Note
-
Product options can only be added to stores created after July 19, 2022.
-
Product options are not available for digital products.
If you sell products with options, such as color and size, you can create one product and add the options to the product instead of creating separate product listings for each option. For example, you can add a shirt as a product, then add color and size as options. Then for each option, you add up to 50 option values. For the color option you could add red, green, and blue as option values. The option values display in a default drop-down menu or optional radio button format on the product page using the Product Options widget. Users can easily switch between these formats through the widget's content tab, with the default setting being a drop-down menu.
You can create up to 20 options across all products, which can then be combined to create variations. To learn more about creating product variations, see Product Variants.
For an overview of options and variations, watch the following video:
<!-- iframe instead of embed for d:videodata -->Create Product Option
When creating options, the option name and values must be in string format. The option name and values you create for one product are automatically saved so you can reuse them in other product listings.
To create product options:
-
In the side panel, click Store, then click Store Management.
-
Click Product Catalog.
-
Click the product you want to add options to. Note that digital products cannot have options.
-
In the Product options section, click +Add options. Note that you can add up to 20 options across all products.
-
Type an option name. The option name appears on the Product page as a label above the Product Options widget.
-
Type option values, separating each value with a comma. You can create up to 50 values per option. The option values, which by default appear in a drop-down menu can also be displayed in radio button format. (Optional) To configure this, access the widget's content tab, where you can switch between drop-down and radio button displays.
-
Click Add, then click Save.
Once you add options to a product, the Product Options widget is automatically added to the Product page. If the Product Options widget is not showing up, you can add it to the Product page from the Widgets panel.
Edit Option Values
You can edit the option values, such as small, medium, large, for an individual product. For example, if you now offer additional shirt sizes, you can add the new sizes as option values to the size option you already created. You can use the same options with different values for different products. For example, shirt size option values can be S and M, while pants size option values can be XS, S, M, and L.
To edit option values:
-
In the side panel, click Store, then click Store Management.
-
Click Product Catalog.
-
Click the product you need to edit option values for.
-
In the Product options section, click the three horizontal dots
 next to the option you need to edit, then select Edit option values.
 -
Type new values, separating each with a comma. Or, you can remove individual values by clicking the X next to the option value.
-
Click Apply, then click Save.
Delete Option Values
You can delete an option, such as size, to remove it from an individual product. Deleting an option also deletes the option values associated with it. If you want to delete an option value from a set of options, see Edit Option Values.
To delete an option:
-
In the side panel, click Store, then click Store Management.
-
Click Product Catalog.
-
Click the product you need to delete an option for.
-
In the Product options section, click the three horizontal dots
 next to the desired option and select Delete option.
 -
Click Delete, then click Save.
Product Variations
Product variants are combinations of product option values. For example, if you sell a shirt with two options: size (with values of small or medium) and color (with values of blue or red). The variants of these options are:
-
Small, blue
-
Small, red
-
Medium, blue
-
Medium, red
Manage Variants
Note
All options must be added before editing variants. If you add a new option after editing variants, it will overwrite all the edits you have made to the variants. To learn how to add or edit options, see Product Options.
To manage variants:
-
In the side panel, click Store, then click Store Management.
-
Click Product Catalog.
-
Click to open the desired product and scroll down to the Manage Variants section.
-
Click Manage Variants.
-
Edit the following fields as necessary:
-
Image. Click to add an image of this particular variation.
-
Variant type. The combination of options. Cannot be edited.
-
Variant price. The base price of the product. Cannot be edited.
-
Price difference. The amount the price needs to increase or decrease from the base price. For example, if the base price is $40 and this particular variation costs $45, you would type +5 in the Price difference field. And if the variation price was $35, you would type -5.
-
Inventory. If the Track Inventory toggle is enabled, you can enter inventory in this field. To learn more, see Product Inventory.
-
SKU. The SKU is automatically inherited from the main product, but you can edit it if necessary.
-
Off/On. Toggle to the Off position to make the variation unavailable in your store.
-
-
Click Apply.
Customizable Products
If you sell a product that offers customizations, such as a bracelet with an engraving, you can add fields to the product page that allows the shopper to enter their customization.
Note
-
Currently, native store only offers a text and multiple choice checkbox fields for shoppers to enter customizations. In the future, we plan to offer a file upload, and more.
-
The product price cannot be configured to change in response to customization selections.
To add a customizable option to a product:
-
In the side panel, click Store, then click Store Management.
-
Click Product Catalog, then click to open the desired product.
-
Scroll down to the Product Customizations section and click + Add Customization.
-
Select an existing customization or click + Create new customization.
-
If you are creating a new customization, select Text Personalization or Multiple Choice. Note that File Upload and more will be available in the future. Depending on your selection, you need to complete various fields.
-
Customization name. The text entered into this field is only visible internally, the shopper will never see it.
-
Title. The text you enter in this field appears on the product page. The title should describe what the shopper needs to do to customize their product. For example, if the customization is an engraving on a bracelet, the label could be “Enter the text you want engraved”.
-
Field hint text. For text fields only. This text appears in the text box where shoppers enter their custom text. It can be used to give shoppers an idea of what to enter.
-
Choices. For multiple choice fields only. Type the choices and seperate each choice with a comma or click enter after typing a choice. Below, you can reorder or delete the choices you created.
-
Make this customization required for purchase. Select the checkbox if you want to require the shopper to use the customization.
-
Limitations. For multiple choice fields only. Enable the toggle if you want to enforce a maximum, minimum, or exact number of choices the shopper can select.
-
-
In the Preview side of the popup, check to ensure your content is displaying properly. When you are satisfied, click Save.
-
For the product customization to display, you need to add the Customize Product widget to the product page. Some Store templates have this built in by default. If your template does not, exit the Store Operations window and in the store panel, click Store Pages, then select Product Page. In the side panel, click Add, then click Widgets, then drag and drop the Customize Product widget onto the desired place on the product page. Note that the widget will not display for products that do not have customizations.
Product Inventory
To manage inventory:
-
In the side panel, click Store, then click Store Management.
-
Click Product Catalog.
-
Click to open the desired product and scroll down to the Inventory section.
-
To manage inventory manually at the product level, keep the Track Inventory toggle in the Off position. Use the Status drop down to select product status and type a value in the SKU field.
-
To manage and automatically track inventory at the variant level, set the Track Inventory toggle to the On position. You will be able to manage inventory on the Manage Variants screen.
-
Click Save.